If you are here, I assume you have heard about WordPress before. If not, let me tell you that it is the most popular, free and open-source content management system available. Used by more than 60 million websites, including around 30% of the top 10 million websites. So this means every website you visit on web, there is 1/3 chance that it is made upon WordPress.
If you are into web development or planning to pursue a career in it, learning to develop upon WordPress can be one of the most important skills you learn. If you already know HTML, CSS, and JavaScript and you can make beautiful websites, developing a WordPress theme for you will be only a matter of few hours. And if you don’t know basics of web development, it is recommended to go through w3schools tutorials first so things don’t get too complicated for you.
Prerequisites
Before you begin with this article, make sure you have:
- Some understanding of HTML & CSS.
- A local (or virtual) server set up.
- WordPress installed on your server.
Why WordPress?
Because using a CMS like WordPress makes website handling a lot easier. If you make a blog, you can add and update your posts. If you make an online store you can manage your products. And if you are developing website for a client who is not familiar with coding, they would want an “admin panel” from where they can control the website and WordPress does exactly that. We can achieve a lot more with WordPress like adding thousands of plug-ins developed by WordPress community with one click or changing entire design of website by installing a new theme without affecting your content. However these functionalities are beyond the scope of this article so we will not discuss it in detail.
Design of your theme
To begin, we need to have a template which we can convert to a WordPress theme. It does not matter what you use for your design – Bootstrap, Foundation, Skeleton or custom CSS. The point is that you should have a design and you like how it looks.
I’m going to take an existing blog template from w3schools website and convert it into WordPress website for this article.
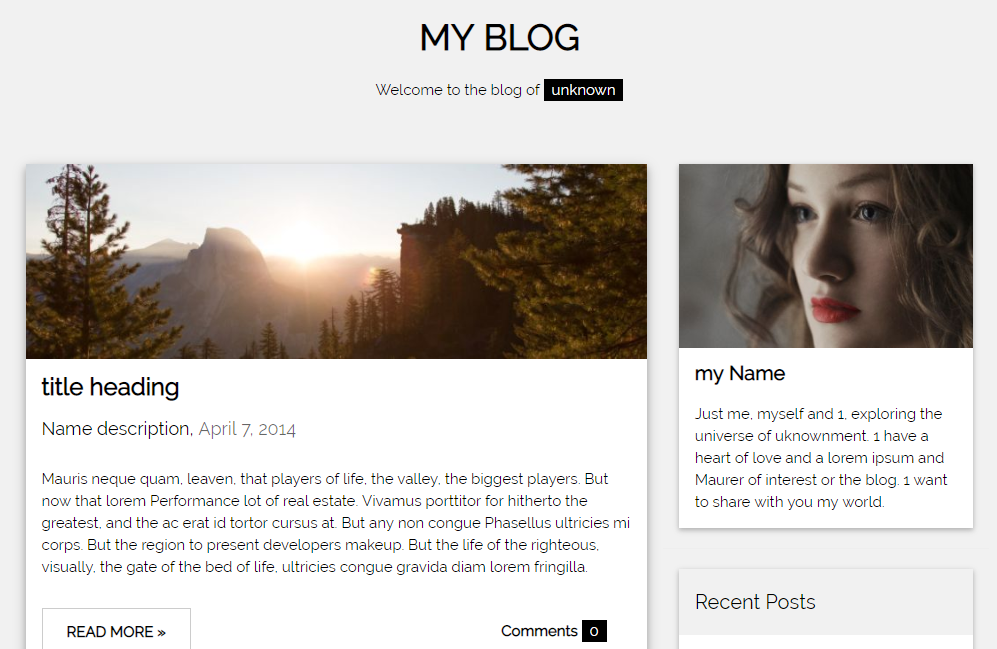
You may also choose any of the templates from their website if you do not have a design to begin with. We will now move in to WordPress files.
Theme development
WordPress when installed will have three main directories – wp-admin, wp-content and wp-includes. All of the customization you will be doing in wp-content folder as other two directories contains core files which you would not want to mess with.
Slide in to wp-content > themes directory to view list of themes folders. There you will see WordPress default themes – twentynineteen, twentyseventeen, twentysixteen – and index.php. Create a new directory for your theme, I called mine mywptheme.
Technically, a WordPress theme needs two files to exist – index.php and style.css. Go ahead and create these two files. Open style.css and write the below code in it:
/*
Theme Name: First Wordpress Theme
Theme URI:http://github.com/abdulhaq/
Author: Abdul Haq
Author URI: http://it.haq.life/
Description: W3schools Blog template converted to WordPress
Version: 0.0.1
Tags: bootstrap
*/
The above comment code in style.css file lets WordPress know that this is a theme and is available for use. Change the name, author and description accordingly. Now if you go to WordPress dashboard, and click on Appearance > Themes, you will see your theme there which can be activated.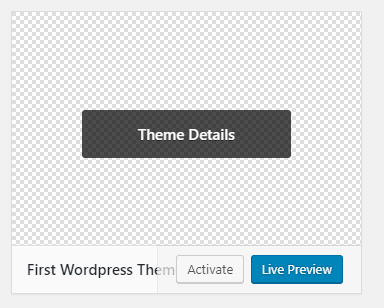
Activate it and go to your website URL and you will see it does nothing as its empty. So let’s add template files to theme. Replace your index.php and style.css with these files and refresh your website. Now you will see a scattered web page as our css file is not loading. This is because paths to resources in WordPress environment are different. Currently our file is linking at www.yourdomain/style.css where it does not exist. It is located at www.yourdomain/wp-content/themes/*yourthemename*/style.css. So we will use some PHP to get correct directory path, just change:
<link rel="stylesheet" href="style.css">To:
<link href="<?php echo get_bloginfo('template_directory'); ?>/style.css" rel="stylesheet">
Similarly for all the images, you will have to change:
<img src="img/woods.jpg">To:
<img src="<?php echo get_bloginfo('template_directory'); ?>/img/woods.jpg">
Make sure you have also uploaded the images to your theme. Now when you reload you page everything works fine and your website look neat. Congratulations, you have completed a WordPress theme. But hold on... how do you get to control it from admin panel?
Adding controls
To add, edit and update blogs and pages from WordPress admin panel we will need to use PHP. Don’t worry if you are not familiar with it, just follow instructions and things will be dead simple for you. First thing we need to do is to divide index.php file in four separate files, header.php, footer.php, sidebar.php and content.php. Header, footer and sidebar will remain same on all pages and only content part will change according to each blog post.
Everything from <!DOCTYPE html> to the main blog header will be in the header file. The header usually contains all the necessary head styles and the top navigation to the website. The only addition I will make to the code is adding <?php wp_head(); ?> right before the closing </head>.
<!DOCTYPE html>
<html>
<head>
<title><?php echo get_bloginfo( 'name' ); ?></title>
<meta charset="UTF-8">
<meta name="viewport" content="width=device-width, initial-scale=1">
<link rel="stylesheet" href="<?php echo get_bloginfo('template_directory'); ?>/style.css">
<link rel="stylesheet" href="https://fonts.googleapis.com/css?family=Raleway">
<style>
body,h1,h2,h3,h4,h5 {font-family: "Raleway", sans-serif}
</style>
<?php wp_head();?>
</head>
<body class="w3-light-grey">

<div class="w3-content">

<!-- Header -->
<header class="w3-container w3-center w3-padding-32">
  <h1><b><a href="#">MY BLOG</a></b></h1>
  <p>Welcome to the blog of unknown</p>
</header>?
Same thing for the footer as the header. It will include whatever visible footer you have, your copy rights (for now) and <?php wp_footer(); ?> right before </body>.
<!-- Footer -->
<footer class="w3-container w3-dark-grey w3-padding-32 w3-margin-top">
  <center>© My WordPress Theme</center>
</footer>
<?php wp_footer(); ?>
</body>
</html>?
Most websites, especially blogs, will have a side area for including content such as archives, tags, categories, ads, etc.
<!-- Introduction menu -->
<div class="w3-col l4">
  <!-- About Card -->
  <div class="w3-card w3-margin w3-margin-top">
  <img src="<?php echo get_bloginfo('template_directory'); ?>/img/avatar_g.jpg" style="width:100%">
    <div class="w3-container w3-white">
      <h4><b>My Name</b></h4>
      <p>Just me, myself and I, exploring the universe of uknownment. I have a heart of love and a interest of lorem ipsum and mauris neque quam blog. I want to share my world with you.</p>
    </div>
  </div><hr>

  <!-- Posts -->
  <div class="w3-card w3-margin">
    <div class="w3-container w3-padding">
      <h4>Categories</h4>
    </div>
    <ul class="w3-ul w3-hoverable w3-white">
      <li class="w3-padding-16">
        <span class="w3-large">Lorem</span><br>
      </li>
      <li class="w3-padding-16">
        <span class="w3-large">Ipsum</span><br>
      </li>
      <li class="w3-padding-16">
        <span class="w3-large">Dorum</span><br>
      </li>
      <li class="w3-padding-16 w3-hide-medium w3-hide-small">
        <span class="w3-large">Mingsum</span><br>
      </li>
    </ul>
  </div>
  <hr>

  <!-- Labels / tags -->
  <div class="w3-card w3-margin">
    <div class="w3-container w3-padding">
      <h4>Tags</h4>
    </div>
    <div class="w3-container w3-white">
    <p><span class="w3-tag w3-black w3-margin-bottom">Travel</span> <span class="w3-tag w3-light-grey w3-small w3-margin-bottom">New York</span> <span class="w3-tag w3-light-grey w3-small w3-margin-bottom">London</span>
      <span class="w3-tag w3-light-grey w3-small w3-margin-bottom">IKEA</span> <span class="w3-tag w3-light-grey w3-small w3-margin-bottom">NORWAY</span> <span class="w3-tag w3-light-grey w3-small w3-margin-bottom">DIY</span>
      <span class="w3-tag w3-light-grey w3-small w3-margin-bottom">Ideas</span> <span class="w3-tag w3-light-grey w3-small w3-margin-bottom">Baby</span> <span class="w3-tag w3-light-grey w3-small w3-margin-bottom">Family</span>
      <span class="w3-tag w3-light-grey w3-small w3-margin-bottom">News</span> <span class="w3-tag w3-light-grey w3-small w3-margin-bottom">Clothing</span> <span class="w3-tag w3-light-grey w3-small w3-margin-bottom">Shopping</span>
      <span class="w3-tag w3-light-grey w3-small w3-margin-bottom">Sports</span> <span class="w3-tag w3-light-grey w3-small w3-margin-bottom">Games</span>
    </p>
    </div>
  </div>

<!-- END Introduction Menu -->
</div>?
If the sidebar is where all the secondary information goes, the content is where all the articles and main content of the website go.
  <!-- Blog entry -->
  <div class="w3-card-4 w3-margin w3-white">
    <img src="<?php echo get_bloginfo('template_directory'); ?>/img/woods.jpg" style="width:100%">
    <div class="w3-container">
      <h3><b>TITLE HEADING</b></h3>
      <h5>Title description, <span class="w3-opacity">April 7, 2014</span></h5>
    </div>

    <div class="w3-container">
      <p>Mauris neque quam, fermentum ut nisl vitae, convallis maximus nisl. Sed mattis nunc id lorem euismod placerat. Vivamus porttitor magna enim, ac accumsan tortor cursus at. Phasellus sed ultricies mi non congue ullam corper. Praesent tincidunt sed
        tellus ut rutrum. Sed vitae justo condimentum, porta lectus vitae, ultricies congue gravida diam non fringilla.</p>
      <div class="w3-row">
        <div class="w3-col m8 s12">
          <p><a href="#"><button class="w3-button w3-padding-large w3-white w3-border"><b>READ MORE »</b></button></a></p>
        </div>
        <div class="w3-col m4 w3-hide-small">
          <p><span class="w3-padding-large w3-right"><b>Comments  </b> <span class="w3-tag">0</span></span></p>
        </div>
      </div>
    </div>
  </div>
  <hr>?
Distributing website content among different files will make our index.php file very short and we will insert header, footer, sidebar and content in it with PHP. Here is how our index.php file look now:
<?php get_header(); ?>

<!-- Grid -->
<div class="w3-row">

<!-- Blog entries -->
<div class="w3-col l8 s12">

 <?php get_template_part( 'content', get_post_format() ); ?>

<!-- END BLOG ENTRIES -->
</div>

<?php get_sidebar(); ?>

<!-- END GRID -->
</div><br>

<!-- END w3-content -->
</div>

<?php get_footer(); ?>
Even if you’ve never used PHP before, this code is all very self explanatory. get_header();, get_sidebar(); and get_footer(); are all functions that look for their respective .php files and insert the code. The content function is slightly different, but it does the same thing.
If you re-load your URL, your entire site is now loaded, just as before. You will notice a top bar if you’re logged in to WordPress admin.
Making site dynamic
Currently our website is all hard coded and nothing can be changed from admin panel. To make site controllable from admin panel, we will first add settings. In your dashboard, go to Settings > General. Set your title.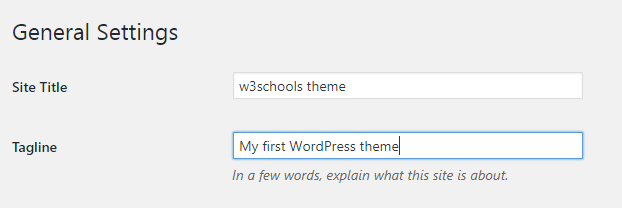
Now in header.php, change the contents of the title tag and main h1 tag to this code:
<?php echo get_bloginfo( 'name' ); ?>
And the <p> tag below h1 tag to this:
<?php echo get_bloginfo( 'description' ); ?>
We would also want to add link to site name so when clicked it takes user to main page. Add following code as link in header:
<a href="<?php echo get_bloginfo( 'wpurl' );?>"><!-- site title --></a>
In case you are confused, this is how our header.php file will look now:
<!DOCTYPE html>
<html>
<head>
<title><?php echo get_bloginfo( 'name' ); ?></title>
<meta charset="UTF-8">
<meta name="viewport" content="width=device-width, initial-scale=1">
<link rel="stylesheet" href="<?php echo get_bloginfo('template_directory'); ?>/style.css">
<link rel="stylesheet" href="https://fonts.googleapis.com/css?family=Raleway">
<style>
body,h1,h2,h3,h4,h5 {font-family: "Raleway", sans-serif}
</style>
<?php wp_head();?>
</head>
<body class="w3-light-grey">

<div class="w3-content">

<!-- Header -->
<header class="w3-container w3-center w3-padding-32">
  <h1><b><a href="<?php echo get_bloginfo( 'wpurl' );?>"><?php echo get_bloginfo( 'name' ); ?></a></b></h1>
  <p><?php echo get_bloginfo( 'description' ); ?></p>
</header>
We’ve finally made the first dynamic change to the page. The front end should reflect what you put in your settings.
Listing blogs
After making header dynamic, next we would want a list of our blog posts to be displayed. So whenever you publish a new blog, it automatically display on your website. For this we will use PHP Loop to fetch data. We will add this loop in index.php file, here is how it will look:
<?php get_header(); ?>

<!-- Grid -->
<div class="w3-row">

<!-- Blog entries -->
<div class="w3-col l8 s12">
  <?php
	if ( have_posts() ) : while ( have_posts() ) : the_post();

	     get_template_part( 'content', get_post_format() );

	endwhile; endif;
  ?>
<!-- END BLOG ENTRIES -->
</div>

<?php get_sidebar(); ?>

<!-- END GRID -->
</div><br>

<!-- END w3-content -->
</div>

<?php get_footer(); ?>
The only thing inside your loop is content.php, which will contain the contents of one single post. So open content.php and change the contents to this:
<?php
$thumb_id = get_post_thumbnail_id();
$thumb_url = wp_get_attachment_image_src($thumb_id,'thumbnail-size', true);
?>
  <!-- Blog entry -->
  <div class="w3-card-4 w3-margin w3-white">
    <img src="<?php echo $thumb_url[0]; ?>" style="width:100%">
    <div class="w3-container">
      <h3><b><?php the_title(); ?></b></h3>
      <h5><?php the_author(); ?>, <span class="w3-opacity"><?php the_date(); ?></span></h5>
    </div>

    <div class="w3-container">
      <p><?php the_excerpt(); ?></p>
      <div class="w3-row">
        <div class="w3-col m8 s12">
          <p><a href="<?php echo get_permalink();?>"><button class="w3-button w3-padding-large w3-white w3-border"><b>READ MORE »</b></button></a></p>
        </div>
        <div class="w3-col m4 w3-hide-small">
          <p><span class="w3-padding-large w3-right"><b>Comments  </b> <span class="w3-tag"><?php echo get_comments_number(); ?></span></span></p>
        </div>
      </div>
    </div>
  </div>
  <hr>
If you see the code above, we are fetching data for each post such as title, image, author, date, excerpt (short extract from post) and number of comments. But to get thumbnail image we need to add a line of code in functions.php. Functions.php is a PHP file that can be used to add features and extend the functionality of your theme. Go ahead and create a functions.php file in your theme directory and add the following line to it:
<?php add_theme_support( 'post-thumbnails' ); ?>
Doing this you will get an option to add 'Featured Image' in your admin dashboard where you add posts. Something like this: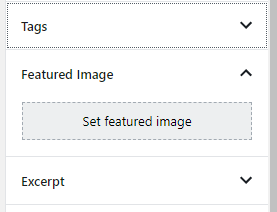
Sidebar code
Next we want to make our sidebar dynamic. We have three boxes in sidebar, first one has image, name and bio of author. Second contains categories and third has tags in it. Just for this tutorial we are going with these items, otherwise you can add anything you want in sidebar. Its totally up to you to decide what you want in sidebar. So here is our sidebar.php code:
<!-- Introduction menu -->
<div class="w3-col l4">
  <!-- About Card -->
  <div class="w3-card w3-margin w3-margin-top">
  <?php echo get_avatar(get_the_author_meta( 'ID' ), 295); ?>
    <div class="w3-container w3-white">
      <h4><b><?php the_author(); ?></b></h4>
      <p><?php echo get_the_author_meta( 'description' )?></p>
    </div>
  </div><hr>

  <!-- Posts -->
  <div class="w3-card w3-margin">
    <div class="w3-container w3-padding">
      <h4>Categories</h4>
    </div>
    <ul class="w3-ul w3-hoverable w3-white">
	<?php $categories=get_categories($cat_args);
  foreach($categories as $category) {
    $args=array(
      'showposts' => -1,
      'category__in' => array($category->term_id),
      'caller_get_posts'=>1
    );
    $posts=get_posts($args);
      if ($posts) {
        echo '<li class="w3-padding-16"><a href="'.get_category_link( $category->term_id ).'"><span class="w3-large">'.$category->name.'</span></a><br></li>';
      }
    }  ?>
    </ul>
  </div>
  <hr>

  <!-- Labels / tags -->
  <div class="w3-card w3-margin">
    <div class="w3-container w3-padding">
      <h4>Tags</h4>
    </div>
    <div class="w3-container w3-white">
    <p>
	    <?php
        $tags = get_tags();
        foreach ( $tags as $tag ) :
        $tag_link = get_tag_link( $tag->term_id );
    ?>
        <a href='<?php echo $tag_link; ?>' title='<?php echo $tag->name; ?>' class='<?php echo $tag->slug ?>'><span class="w3-tag w3-light-grey w3-small w3-margin-bottom"><?php echo $tag->name ?></span></a>
    <?php
        endforeach;
    ?>
    </p>
    </div>
  </div>

<!-- END Introduction Menu -->
</div>
Author image, name and bio can be edited from Dashboard > Users. Also make sure you assign some tags to your posts and create a few categories so we don't have empty boxes. Now go to your website and everything looks complete except when we click on 'Read more' button, full blog does not appear. For this we need to create a new file named Single.php, which will display full blog post. So lets do it.
<?php get_header(); ?>
<!-- Grid -->
<div class="w3-row">
<!-- Blog entries -->
<div class="w3-col l8 s12">
<?php
if ( have_posts() ) : while ( have_posts() ) : the_post();
$thumb_id = get_post_thumbnail_id();
$thumb_url = wp_get_attachment_image_src($thumb_id,'thumbnail-size', true);
?>
<!-- Blog entry -->
<div class="w3-card-4 w3-margin w3-white">
<img src="<?php echo $thumb_url[0]; ?>" style="width:100%">
<div class="w3-container">
<h3><b><?php the_title(); ?></b></h3>
<h5><?php the_author(); ?>, <span class="w3-opacity"><?php the_date(); ?></span></h5>
</div>
<div class="w3-container">
<p><?php the_content(); //the_content the_excerpt(); ?></p>
<div class="w3-row">
<div class="w3-col m8 s12">
<p><a href="<?php echo get_permalink();?>"><button class="w3-button w3-padding-large w3-white w3-border"><b>READ MORE »</b></button></a></p>
</div>
<div class="w3-col m4 w3-hide-small">
<p><span class="w3-padding-large w3-right"><b>Comments </b> <span class="w3-tag"><?php echo get_comments_number(); ?></span></span></p>
</div>
</div>
</div>
</div>
<hr>
<?php
endwhile; endif;
?>
<!-- END BLOG ENTRIES -->
</div>
<?php get_sidebar(); ?>
<!-- END GRID -->
</div><br>
<!-- END w3-content -->
</div>
<?php get_footer(); ?>
This file is a copy of index.php file, except I have added content.php code directly in it with one small change. Instead of <?php the_excerpt(); ?> in blog body I have written <?php the_content(); ?> so full blog content is show instead of short extract.
And THAT'S IT! You have finally developed your first WordPress theme. If there is anything you did not understood, feel free to contact me. Also make Google and Stackoverflow your friends as they will come in very handy for you develop complex themes. Hope this tutorial was helpful to get you started.
